✓ Building a PC can be more cost-effective than buying pre-built.
✓ Customization allows for tailored performance and aesthetics.
✓ No prior experience is necessary with the right guidance.
✓ Proper component selection is crucial for optimal gaming.
✓ The process is similar to assembling LEGOs for adults.
How It Works
1
Select Your Components
Research and choose compatible parts based on your budget and desired performance. This includes CPU, GPU, motherboard, RAM, storage, PSU, and case.
2
Assemble Core Components
Install the CPU, CPU cooler, and RAM onto the motherboard. This forms the central processing unit of your new gaming rig.
3
Mount Motherboard and Graphics Card
Secure the assembled motherboard inside the PC case and then install your powerful graphics card. Ensure all necessary power cables are connected.
4
Connect Peripherals and OS Installation
Wire up all remaining components, including storage and power supply, then install your operating system. Finally, install drivers and enjoy your custom PC.
Demystifying Component Selection for Your Custom Gaming Rig
Photo: Shawn Stutzman / Pexels
Embarking on the journey of how to build a gaming PC step by step begins with the most critical phase: selecting your components. This isn't just about picking the most expensive parts; it's about intelligent allocation of your budget to achieve the best performance for your specific gaming needs. The core components you'll need to consider are the Central Processing Unit (CPU), Graphics Processing Unit (GPU), Motherboard, Random Access Memory (RAM), Storage (SSD/HDD), Power Supply Unit (PSU), and PC Case. Each plays a pivotal role in the overall system's performance and stability.
Let's start with the CPU, often called the 'brain' of your computer. For gaming, a strong CPU ensures smooth frame rates, especially in CPU-intensive games or when multitasking. Intel's Core i5/i7/i9 series or AMD's Ryzen 5/7/9 series are popular choices. The choice between Intel and AMD often comes down to budget, specific game optimization, and personal preference. Researching benchmarks for your target games with different CPUs is highly recommended. The GPU, or graphics card, is arguably the most important component for gaming performance. It renders the stunning visuals you see on your monitor. NVIDIA's GeForce RTX series and AMD's Radeon RX series dominate this market. Your GPU choice will largely dictate the resolution and frame rates you can achieve. Investing a significant portion of your budget here is usually a wise decision for a dedicated gaming machine. The Motherboard acts as the central nervous system, connecting all your components. It needs to be compatible with your chosen CPU (socket type) and RAM (DDR4/DDR5). Key features to look for include sufficient PCIe slots for your GPU and potentially other expansion cards, enough SATA ports for storage, and USB connectivity. Don't skimp entirely on the motherboard, as a good one offers better stability and upgrade paths. RAM, or memory, is where your system stores data for quick access. For modern gaming, 16GB is considered the sweet spot, with 32GB offering more headroom for multitasking or future-proofing. Look for DDR4 or DDR5 RAM with decent speeds (e.g., 3200MHz or higher for DDR4, 6000MHz or higher for DDR5).
Storage is twofold: a fast Solid State Drive (SSD) for your operating system and frequently played games, and potentially a larger, more affordable Hard Disk Drive (HDD) for mass storage of less critical files. NVMe SSDs are significantly faster than traditional SATA SSDs and are highly recommended for your primary drive. The Power Supply Unit (PSU) provides power to all your components. It's crucial to choose a PSU with sufficient wattage for your system's needs and a good efficiency rating (e.g., 80 Plus Bronze, Gold, Platinum). Never underestimate the importance of a reliable PSU; a cheap, unreliable one can damage other components. Finally, the PC Case houses everything. Beyond aesthetics, consider airflow, cable management options, and compatibility with your chosen motherboard size (ATX, Micro-ATX, Mini-ITX) and GPU length. Planning these components carefully will lay a solid foundation for your successful build. For more detailed insights into specific component types, check out our guide on choosing PC parts.
The Assembly Process: Bringing Your Gaming PC to Life
Photo: Valentine Tanasovich / Pexels
Now that you've meticulously selected your components, the exciting part of how to build a gaming PC step by step begins: the assembly. While it might seem daunting, approaching it systematically makes the process straightforward. Before you start, gather your tools: a Phillips head screwdriver (magnetic tip is a bonus), zip ties or Velcro straps for cable management, and anti-static wrist strap or a bare metal surface to periodically discharge static electricity. Static discharge is a silent killer of electronics, so always be mindful of it. Unpack your motherboard and place it on its anti-static bag or the motherboard box. This provides a safe, non-conductive surface to work on.
First, install the CPU. Carefully open the CPU retention lever on the motherboard socket. Align the triangular or arrow marker on the CPU with the corresponding marker on the socket. Gently place the CPU into the socket; it should drop in with almost no force. If you need to push, it's likely misaligned. Close the retention lever to secure the CPU. Next, install the CPU cooler. If you have an aftermarket cooler, you'll likely need to install a backplate behind the motherboard first. Apply thermal paste (if not pre-applied to the cooler) and mount the cooler according to its instructions. Ensure it's firmly attached and the fan is oriented correctly. After the CPU cooler, install the RAM. Open the clips on the RAM slots. Align the notch on the RAM stick with the notch in the slot and push down firmly on both ends until the clips snap into place. Repeat for all RAM sticks, following your motherboard's dual-channel or quad-channel configuration guidelines (usually alternating slots).
With the core components on the motherboard, it's time to install the motherboard into the PC case. First, install the I/O shield (the metal plate with cutouts for your motherboard's ports) into the back of the case from the inside, if it's not pre-attached to your motherboard. Then, install the standoffs in the case – these are small screws or risers that prevent the motherboard from touching the metal case, preventing short circuits. Carefully lower the motherboard onto the standoffs, aligning the screw holes, and secure it with screws. Next up is the Graphics Processing Unit (GPU). Open the PCIe retention clip on the motherboard's primary PCIe slot. Align the GPU with the slot and push down firmly until it clicks into place. Secure the GPU to the case with screws. Connect the necessary PCIe power cables from your PSU to the GPU. Finally, install your storage drives. SSDs typically mount in dedicated bays, while HDDs slide into drive cages. Connect the SATA data cables to the motherboard and SATA power cables from the PSU. Connect all front panel connectors (power button, USB ports, audio jacks) from the case to their respective headers on the motherboard. This part requires careful attention to your motherboard manual.
Powering Up and Software Setup: The Final Frontier
Photo: Pok Rie / Pexels
You've successfully navigated the intricate physical build process of how to build a gaming PC step by step. Now comes the moment of truth: powering it on and installing the necessary software. This stage is just as crucial, as it transforms your collection of hardware into a functional, high-performance gaming machine. Before you hit that power button, double-check all your connections. Are the CPU power cable, motherboard power cable (24-pin), GPU power cables, and all storage power and data cables securely connected? Are the front panel connectors correctly installed? A loose connection can prevent your system from booting or cause instability. Once confident, connect your monitor, keyboard, and mouse to the appropriate ports on the back of your PC. Plug in the power cable to the PSU and flip the PSU's power switch to the 'on' position. Then, press the power button on the front of your case.
If all goes well, your fans will spin up, and you'll see a display on your monitor, likely the motherboard's splash screen or BIOS/UEFI interface. If nothing happens, don't panic! Troubleshoot by re-checking power connections, ensuring RAM is seated correctly, and that the CPU cooler fan is plugged in. Once you're in the BIOS/UEFI, you might want to quickly check if all components (CPU, RAM, storage) are detected. You can also enable XMP (Extreme Memory Profile) or DOCP (Direct Overclock Profile) for your RAM to ensure it runs at its advertised speed, as it often defaults to a slower speed. Save and exit the BIOS. The next step is to install your operating system. For most gamers, this will be Windows. You'll need a USB flash drive with the Windows installation media created using Microsoft's Media Creation Tool. Insert the USB drive, restart your PC, and boot from the USB drive (you might need to select it from a boot menu or change the boot order in the BIOS). Follow the on-screen prompts to install Windows. Choose your primary SSD as the installation drive for optimal performance.
After Windows is installed, the work isn't quite done. You'll need to install drivers for your components. Start with your motherboard chipset drivers, which can be found on your motherboard manufacturer's website. Then, install the latest graphics card drivers from NVIDIA's or AMD's website. These are absolutely critical for gaming performance. Also, install drivers for any other peripherals like Wi-Fi adapters or sound cards. Finally, install any necessary software utilities, such as your motherboard's monitoring software, RGB control software, and your favorite game launchers (Steam, Epic Games, etc.). Run Windows Update to ensure your operating system is fully patched. With drivers and updates complete, your custom-built gaming PC is ready for action! You've successfully completed the process of how to build a gaming PC step by step, from components to a fully functional battle station. For tips on optimizing your new rig, see our guide on PC gaming performance.
Common Mistakes and Essential Tips for First-Time Builders
Photo: Matheus Bertelli / Pexels
Building a gaming PC is a rewarding experience, but it's easy to make a few common missteps, especially for first-timers. Being aware of these pitfalls and armed with some expert tips can save you time, frustration, and potential damage to your components. Here are some key considerations:
* **Forgetting the I/O Shield:** This small metal plate often gets overlooked until the motherboard is already installed, requiring you to remove the motherboard to fit it. Install it first!
* **Improper Thermal Paste Application:** Too much or too little thermal paste, or uneven spreading, can lead to poor CPU cooling and thermal throttling. A pea-sized dot in the center of the CPU is usually sufficient for most coolers.
* **Incorrect RAM Seating:** RAM sticks need to be pushed firmly until the clips on both ends snap into place. If not fully seated, your PC won't boot.
* **Ignoring Cable Management:** While not strictly necessary for functionality, poor cable management restricts airflow, makes future upgrades harder, and looks messy. Take your time to route cables neatly behind the motherboard tray.
* **Forgetting to Install Drivers:** Your PC might boot, but without proper graphics drivers, gaming performance will be abysmal. Always install the latest drivers from the manufacturer's website.
* **Static Electricity:** Always ground yourself by touching a bare metal surface of the case before handling components, or use an anti-static wrist strap. This protects sensitive electronics from static discharge.
* **Not Reading Manuals:** Motherboard manuals, in particular, contain crucial information about header locations, RAM slot configurations, and troubleshooting codes. Don't throw them aside.
* **Bench Testing Outside the Case:** For advanced builders, assembling the core components (CPU, cooler, RAM, GPU) on the motherboard box before installing it into the case can help verify basic functionality and catch dead-on-arrival components early.
By keeping these tips in mind, your journey on how to build a gaming PC step by step will be much smoother and more enjoyable, culminating in a powerful, custom-built machine you can be proud of.
Comparison
Feature
DIY Build
Pre-Built PC
Gaming Laptop
Cost-Efficiency
Excellent (often cheaper for same specs)
Good (convenience premium)
Fair (mobility premium)
Customization
Unlimited (parts, aesthetics, upgrades)
Limited (pre-selected parts)
Extremely Limited
Upgradeability
High (modular components)
Low to Moderate (some parts locked)
Very Low
Performance/Price
Highest value
Good value for convenience
Lowest value
Troubleshooting
Requires user knowledge
Manufacturer support
Manufacturer support
Learning Curve
Moderate to High
None
None
Portability
✗
✗
✓
What Readers Say
★★★★★
"This guide truly broke down how to build a gaming PC step by step. I was intimidated, but the clear instructions and tips made it feel like I had an expert beside me. My new PC runs flawlessly!"
Alex P. · Austin, TX
★★★★★
"Finally, a resource that explains how to build a gaming PC step by step without making it overly technical. The component selection advice was invaluable for my budget build, and the assembly section was incredibly easy to follow."
Sarah L. · Miami, FL
★★★★★
"Following this guide, I built my first PC in a single afternoon. The performance is exactly what I hoped for, and I saved hundreds compared to buying a pre-built. Highly recommend for anyone wanting to learn how to build a gaming PC step by step."
Mark D. · Seattle, WA
★★★★★
"The guide was mostly excellent, especially the troubleshooting section. I did have a small hiccup with a power cable, but the detailed component checks helped me resolve it quickly. A fantastic resource for how to build a gaming PC step by step."
Jessica R. · Denver, CO
★★★★★
"As someone who builds PCs for friends, I found this article to be a perfect recommendation for beginners. It covers all the crucial details on how to build a gaming PC step by step that often get missed in other guides. Very comprehensive!"
Kevin F. · Chicago, IL
Frequently Asked Questions
Is it really cheaper to build my own gaming PC?
Generally, yes. Building your own gaming PC allows you to select components based on price-to-performance ratios, often resulting in a more powerful machine for the same budget compared to a pre-built system. You also avoid assembly fees and proprietary parts.
Do I need any special tools to build a PC?
No, not really. The most essential tool is a Phillips head screwdriver, preferably magnetic-tipped. An anti-static wrist strap is recommended but not strictly necessary if you periodically ground yourself. Zip ties or Velcro straps are useful for cable management.
How long does it take to build a gaming PC step by step?
For a first-time builder, the physical assembly can take anywhere from 3 to 6 hours, depending on complexity and how meticulously you follow instructions. Software installation and driver setup might add another 1-2 hours. Experienced builders can often complete it in 1-2 hours.
What's the most important component for gaming performance?
The Graphics Processing Unit (GPU) is typically the single most important component for gaming performance. It directly impacts frame rates, resolution capabilities, and graphical fidelity. A powerful GPU should be a priority in your budget.
Should I buy an Intel or AMD CPU for gaming?
Both Intel and AMD offer excellent CPUs for gaming. The choice often depends on your specific budget, the games you play, and whether you plan to multitask heavily. Both companies release new generations regularly, so it's best to check current benchmarks and reviews for the best value at your price point.
Who should consider building their own gaming PC?
Anyone looking for maximum performance for their money, extensive customization options, the ability to easily upgrade components in the future, or simply the satisfaction of a DIY project should consider building their own gaming PC. It's also great for learning more about computer hardware.
Can I damage components if I make a mistake?
While it's possible, significant damage is rare if you follow instructions carefully and take precautions against static electricity. Most common 'mistakes' like improperly seated RAM or loose cables simply prevent the PC from booting, which can be troubleshooted without permanent damage.
What's the future trend for gaming PC builds?
Future trends point towards increased integration of AI accelerators within CPUs and GPUs, more efficient power delivery, widespread adoption of faster memory standards (like DDR5), and continued innovation in cooling solutions. Wireless connectivity will also become even more robust.
Ready to take control of your gaming experience and unleash the full potential of custom hardware? By learning how to build a gaming PC step by step, you're not just assembling parts; you're crafting a personalized powerhouse. Start your build today and join the ranks of satisfied DIY PC gamers!

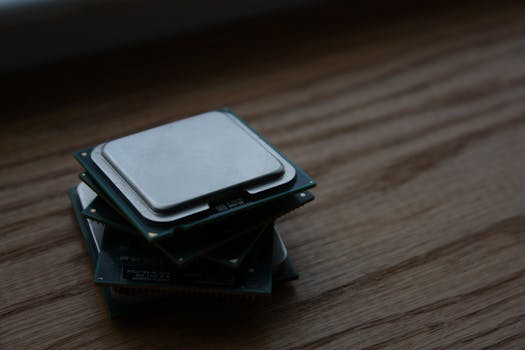 Photo: Shawn Stutzman / Pexels
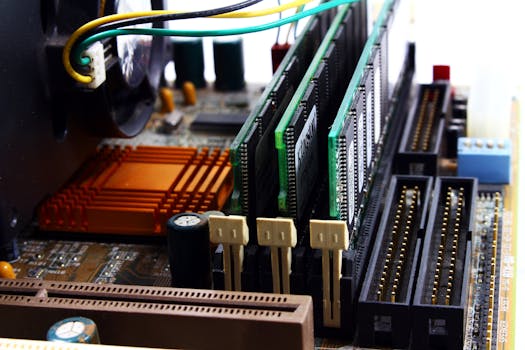 Photo: Valentine Tanasovich / Pexels
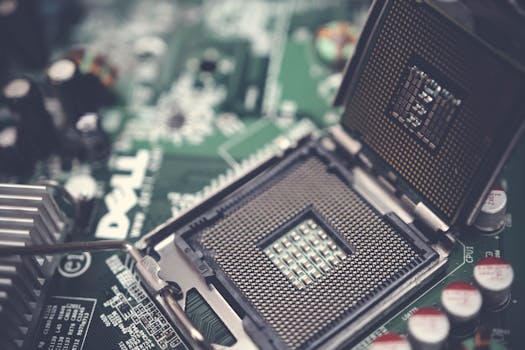 Photo: Pok Rie / Pexels
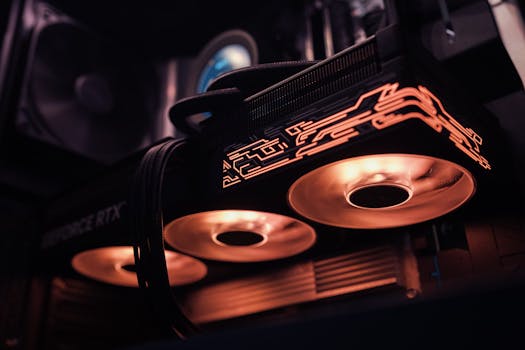 Photo: Matheus Bertelli / Pexels