How to Build a Gaming PC: Your Ultimate DIY Guide
how to build a gaming PC

How to Build a Gaming PC: Your Ultimate DIY Guide

Unlock unparalleled gaming performance and save money by assembling your own custom gaming PC with our expert-led instructions.

Start Building Today

Key Takeaways

  • ✓ Building your own gaming PC can save you money compared to pre-built systems.
  • ✓ You gain full control over component selection, optimizing for performance and aesthetics.
  • ✓ The process is modular, making future upgrades straightforward.
  • ✓ No specialized tools are typically required beyond a screwdriver and zip ties.

How It Works

1
Plan Your Build & Budget

Determine your performance goals (e.g., 1080p, 1440p, 4K gaming) and allocate your budget across essential components like the CPU, GPU, and motherboard. Research compatibility between parts.

2
Gather Your Components & Tools

Acquire all selected parts, including CPU, GPU, motherboard, RAM, storage, PSU, and case. Ensure you have basic tools like a Phillips head screwdriver, zip ties, and an anti-static wrist strap.

3
Assemble Core Components

Install the CPU onto the motherboard, secure the CPU cooler, and insert RAM modules. Mount the motherboard into the PC case, followed by the power supply unit (PSU).

4
Connect & Test

Install the graphics card (GPU), storage drives, and connect all necessary power and data cables. Perform an initial boot test to ensure all components are recognized before final cable management and OS installation.

Why Build Your Own Gaming PC? The Unbeatable Advantages
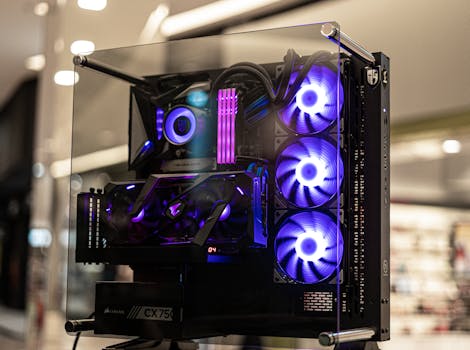
Modern gaming computer with vibrant LED fans and sleek glass design, showcasing high-performance components. Photo: Nathan b Caldeira / Pexels
Embarking on the journey of how to build a gaming PC is more than just assembling components; it's an investment in unparalleled control, customization, and often, significant cost savings. While pre-built systems offer convenience, they rarely match the value and tailored performance of a DIY build. The primary advantage lies in customization. When you build your own PC, you get to hand-pick every single component. This means you can allocate your budget precisely where it matters most for your specific gaming habits. Are you a competitive esports player needing high frame rates at 1080p? You might prioritize a powerful CPU and a fast refresh rate monitor, perhaps opting for a slightly less expensive GPU. Or are you a single-player enthusiast craving stunning 4K visuals? Then a top-tier graphics card will be your focus. This granular control ensures every dollar spent contributes directly to your desired gaming experience, avoiding the compromises often found in off-the-shelf machines. Optimizing your PC for specific games becomes an art form, not a limitation. Beyond customization, cost-efficiency is a major draw. Pre-built systems typically carry a premium for assembly, warranty, and brand overhead. By sourcing components yourself, you can often find better deals, take advantage of sales, and avoid paying for features you don't need. This isn't just about saving money upfront; it's also about future-proofing. A self-built PC is inherently modular. When a new generation of graphics cards or processors emerges, you can upgrade individual components rather than replacing the entire system. This not only saves money in the long run but also extends the lifespan of your investment significantly. Furthermore, understanding how your PC is put together empowers you to troubleshoot issues more effectively. You'll gain invaluable knowledge about hardware interactions, which can turn frustrating problems into solvable puzzles. This hands-on experience demystifies the technology, making you a more informed and capable PC owner. The satisfaction of powering on a machine you built with your own hands, knowing every component was chosen by you for you, is an experience no pre-built system can replicate. It’s a rewarding project that transforms you from a consumer into a creator, giving you a deeper appreciation for the technology that drives your gaming adventures. This guide aims to equip you with all the knowledge needed to confidently undertake this rewarding endeavor, making the dream of a personalized, high-performance gaming rig a reality. The process, while seemingly daunting, is broken down into manageable steps, making it accessible even for first-time builders. You'll learn about component compatibility, installation techniques, and essential post-build setup, ensuring a smooth and successful transition from parts to a powerful gaming machine. The journey of building your own gaming PC is an empowering one, offering not just a high-performance machine but also a significant learning experience that pays dividends for years to come. It’s a testament to personal achievement and smart resource allocation in the world of high-performance computing.

Essential Components: What You Need to Know
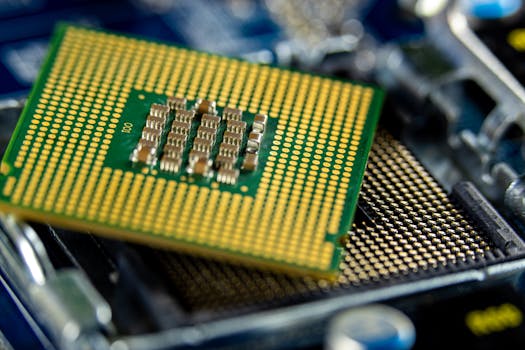
Detailed close-up of a microprocessor on a motherboard showcasing its intricate design. Photo: Sergei Starostin / Pexels
Before you can dive into how to build a gaming PC, understanding the core components and their roles is paramount. Each part plays a crucial role in your system's overall performance, and choosing wisely ensures compatibility and meets your gaming aspirations. The Central Processing Unit (CPU), often called the 'brain' of the PC, executes instructions and performs calculations. For gaming, you'll want a CPU with a good balance of core count and high clock speed. Intel's Core i5/i7/i9 series and AMD's Ryzen 5/7/9 series are popular choices, with newer generations offering significant performance gains. Consider your budget and the games you play; a higher-end CPU may be overkill for casual gaming but essential for competitive titles or streaming. The Graphics Processing Unit (GPU), or graphics card, is arguably the most critical component for gaming performance. It renders images, videos, and animations, directly impacting your in-game frame rates and visual fidelity. NVIDIA's GeForce RTX series and AMD's Radeon RX series dominate the market. Your choice here should align with your monitor's resolution and refresh rate (e.g., RTX 4070 for 1440p high refresh, RTX 4090 for 4K). This is often the most expensive single component, so allocate a significant portion of your budget here. The Motherboard acts as the central nervous system, connecting all your components. It must be compatible with your chosen CPU (socket type), RAM (DDR4 or DDR5), and other peripherals. Look for features like sufficient M.2 slots for fast storage, PCIe 4.0 or 5.0 for your GPU, and adequate USB ports. Popular chipsets include Intel's Z790/B760 and AMD's X670E/B650. Don't skimp entirely on the motherboard; a good one ensures stability and future upgrade potential. Random Access Memory (RAM) is your system's short-term memory, allowing your CPU to quickly access data. For gaming, 16GB is the minimum recommended, with 32GB becoming the sweet spot for modern titles and multitasking. Look for DDR4 or DDR5 RAM kits with higher frequencies (e.g., 3200MHz for DDR4, 6000MHz+ for DDR5) and lower CAS latency for better performance. Storage comes in two main forms: Solid State Drives (SSDs) and Hard Disk Drives (HDDs). SSDs, especially NVMe M.2 drives, offer significantly faster boot times and game loading speeds. An NVMe SSD of 1TB or 2TB is highly recommended for your operating system and primary games. HDDs can be used for mass storage of less frequently accessed files. Finally, the Power Supply Unit (PSU) delivers electricity to all your components. It's crucial to choose a PSU with sufficient wattage to power your entire system and a good efficiency rating (e.g., 80 Plus Bronze, Gold, Platinum). Use online PSU calculators to estimate your wattage needs, adding a buffer for future upgrades. A reliable PSU protects your components and ensures system stability. The PC Case houses all these components, offering airflow, aesthetics, and structural support. Choose a case that accommodates your motherboard size, GPU length, and desired cooling solutions. Good airflow is vital to prevent overheating and maintain optimal performance. Understanding these components is the first step towards a successful and powerful gaming PC build.

Step-by-Step Assembly: Bringing Your Dream Rig to Life
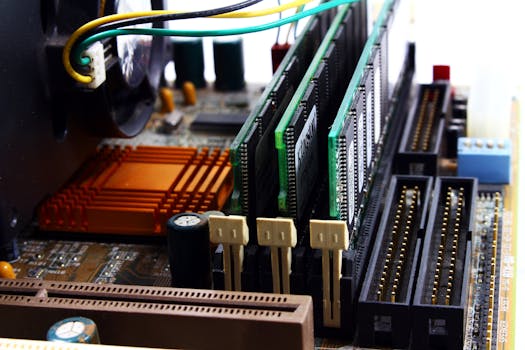
Detailed view of computer motherboard featuring RAM, chipset, and wiring. Photo: Valentine Tanasovich / Pexels
Now that you understand the components, it's time to learn how to build a gaming PC by physically assembling it. This process, while detailed, is highly rewarding. Before you begin, ensure you have a clean, well-lit workspace and an anti-static wrist strap to protect sensitive components from electrostatic discharge. Ground yourself by touching a metal object before handling parts. Proper preparation prevents common mistakes. **1. Prepare the Motherboard:** Start by installing the CPU onto the motherboard. Carefully open the CPU socket lever, align the CPU's golden triangle or notch with the corresponding mark on the socket, and gently place it in. Do not force it. Close the lever to secure the CPU. Next, install the CPU cooler. If it's an air cooler, apply thermal paste (if not pre-applied) and mount it according to the manufacturer's instructions. For AIO liquid coolers, install the pump head over the CPU and prepare the radiator for mounting in the case. Finally, install your RAM sticks into the designated slots, ensuring they click firmly into place. Consult your motherboard manual for the correct slot configuration for dual-channel or quad-channel memory. **2. Mount the Motherboard and PSU:** Carefully place your motherboard into the PC case, aligning it with the standoff screws. Secure it with the appropriate screws. Next, install the Power Supply Unit (PSU) into its designated bay, usually at the bottom or top rear of the case. Ensure the fan is oriented correctly for optimal airflow (often facing downwards if there's a filtered vent). Secure it with screws from the rear of the case. **3. Install Storage and Graphics Card:** Mount your NVMe SSDs directly onto the motherboard's M.2 slots, securing them with a small screw. If you have 2.5-inch SSDs or 3.5-inch HDDs, install them into the drive bays provided by your case. Now, for the star of the show: the Graphics Processing Unit (GPU). Locate the primary PCIe x16 slot on your motherboard (usually the top one). Remove the corresponding PCIe slot covers from your case. Gently push down the retention clip on the PCIe slot, align your GPU, and firmly push it into the slot until it clicks. Secure it to the case with screws. **4. Cable Management and Initial Boot:** This is where things can get a bit messy. Connect all necessary power cables from the PSU to your components: the 24-pin ATX power to the motherboard, the 4+4-pin or 8-pin EPS power to the CPU, and the PCIe power cables to your GPU. Connect SATA power and data cables to your SSDs/HDDs. Finally, connect the front panel connectors (power switch, reset switch, USB ports, audio jacks) to the motherboard. This can be tricky; refer to your motherboard manual. Once all connections are made, tidy up your cables using zip ties or Velcro straps to improve airflow and aesthetics. Before closing up the case, connect a monitor, keyboard, and mouse, and perform an initial boot test. If everything powers on and you see a display, congratulations! You've successfully assembled your gaming PC. Now you can proceed with installing your operating system and drivers.

Post-Build Essentials and Troubleshooting Tips
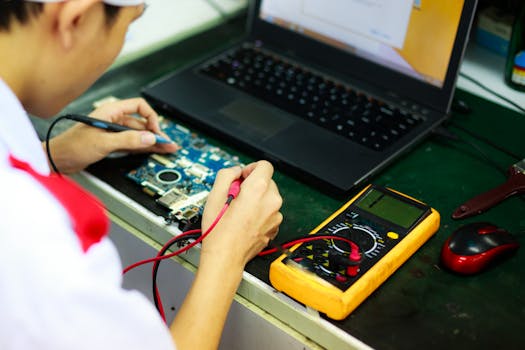
Technician working on a laptop with multimeter in a professional workspace. Photo: Quang Nguyen Vinh / Pexels
Successfully learning how to build a gaming PC doesn't end with assembly; the post-build phase is crucial for optimizing performance and ensuring stability. The very first step after a successful initial boot is to install your operating system, typically Windows. Create a bootable USB drive with the Windows Media Creation Tool on another computer, then boot from it on your new PC to begin the installation. Once Windows is installed, the next critical step is to install all necessary drivers. Start with your motherboard chipset drivers, followed by your graphics card drivers (downloaded directly from NVIDIA or AMD's website). Don't forget drivers for your network card, audio, and any other peripherals. Outdated or missing drivers are common culprits for performance issues or hardware malfunctions. Regularly updating these drivers is a good practice to maintain optimal performance and compatibility with new games. Once drivers are installed, it's time for system updates. Windows Updates often include important security patches and performance enhancements. After updates, consider installing essential utilities like a web browser, antivirus software, and a monitoring tool (e.g., HWMonitor or MSI Afterburner) to keep an eye on temperatures and clock speeds. For gaming, benchmarking tools like 3DMark or Cinebench can help you assess your system's performance and ensure everything is running as expected. This also provides a baseline for future comparisons. **Common Troubleshooting Tips:** * **No Display/No Boot:** Double-check all power connections (24-pin ATX, CPU, GPU). Ensure your monitor is plugged into the graphics card, not the motherboard's integrated graphics port. Reseat RAM sticks and the GPU. If your CPU has integrated graphics, try removing the GPU and booting with integrated graphics to rule out a GPU issue. * **PC Powers On But No Display:** This often indicates a RAM issue. Try booting with one RAM stick at a time, testing each slot. Consult your motherboard manual for the correct RAM slot configuration. * **Overheating:** Monitor CPU and GPU temperatures. Ensure all fans are spinning correctly and oriented for optimal airflow. Reapply thermal paste to the CPU cooler if temperatures are consistently high. Ensure your case has adequate ventilation. * **Random Crashes/Blue Screens:** This can be caused by unstable overclocks, faulty RAM, or driver issues. Run a memory diagnostic tool (Windows Memory Diagnostic) and ensure all drivers are up to date. If you've overclocked, revert to default settings. * **Slow Performance:** Check task manager for background processes consuming resources. Ensure your games are installed on your faster SSD drive. Verify your GPU drivers are current. These troubleshooting steps can save you a lot of headache and keep your gaming rig running smoothly for years to come. Remember, patience is key, and the internet is a vast resource for specific error codes or symptoms.

Comparison

FeatureDIY Gaming PCPre-built Gaming PCGaming Laptop
Cost-EfficiencyExcellent (often lower price for performance)Good (convenience premium)Moderate (portability premium)
CustomizationMaximum (choose every part)Limited (fixed configurations)Very Limited (fixed components)
UpgradeabilityExcellent (modular components)Limited (motherboard/case restrictions)Poor (CPU/GPU often soldered)
Performance/PriceHighest (optimized for budget)High (value varies by brand)Lower (thermal/size constraints)
Learning CurveModerate to HighLow (plug and play)Low (plug and play)
PortabilityNoneNoneExcellent
Warranty CoverageIndividual component warrantiesSingle system warrantySingle system warranty

What Readers Say

"Following this guide to build a gaming PC was incredibly empowering! I saved hundreds compared to a pre-built and got exactly the performance I wanted. The step-by-step instructions made it feel less daunting."

Alex R. · Seattle, WA

"I was hesitant to build my own, but the detailed component breakdown and assembly tips gave me the confidence. My new rig runs all my games flawlessly, and I now understand my computer much better."

Maria S. · Austin, TX

"My custom-built gaming PC, guided by this article, achieved a 20% higher benchmark score than a similarly priced pre-built system I considered. The performance difference is noticeable in every game I play."

Ben C. · Chicago, IL

"The guide was mostly fantastic, though I wish there was a bit more on specific cable routing strategies for different cases. Still, I successfully built my first PC, and it's a beast!"

Chloe L. · Denver, CO

"As a graphic designer who also games, building my PC allowed me to perfectly balance CPU power for rendering with GPU power for gaming. This guide was essential for making informed decisions on how to build a gaming PC that met all my needs."

David K. · Miami, FL

Frequently Asked Questions

Is it really cheaper to build your own gaming PC?

Generally, yes. Building your own gaming PC often allows you to get more performance for your money compared to buying a pre-built system. You can take advantage of sales on individual components and avoid the assembly and brand-name premiums associated with pre-built machines. While initial component costs might seem high, the long-term value and upgradeability usually result in significant savings.

Is building a gaming PC difficult for a beginner?

While it requires patience and attention to detail, building a gaming PC is very achievable for beginners with the right guidance. Most components are designed to be installed in a specific way, making errors less likely. Our comprehensive guide breaks down each step, making the process manageable and rewarding. Many first-time builders successfully complete their rigs.

What are the absolute essential tools I need to build a gaming PC?

The most essential tools are a Phillips head screwdriver (magnetic tip is a bonus), zip ties or Velcro straps for cable management, and an anti-static wrist strap or mat to protect components from static electricity. A headlamp can also be useful for seeing inside the case, and a pair of small snips for cutting zip ties.

How much should I budget for a decent gaming PC?

A 'decent' gaming PC can range widely depending on your performance expectations. For 1080p gaming at high settings, a budget of $800-$1200 is a good starting point. For 1440p gaming or high-refresh-rate 1080p, expect to spend $1200-$1800. For top-tier 4K gaming, budgets typically start from $2000 and go upwards. Always prioritize your GPU and CPU based on your target resolution and frame rate.

Should I buy a pre-built gaming PC or build my own?

Building your own offers superior customization, better value for money, and a deeper understanding of your system, making future upgrades and troubleshooting easier. Pre-built PCs offer convenience, a single warranty, and are ready to use out of the box. If you value control, learning, and long-term cost savings, building is better. If convenience and immediate use are paramount, a pre-built might suit you.

Who should consider building their own gaming PC?

Anyone looking for maximum performance per dollar, complete control over their hardware choices, or simply the rewarding experience of creating something powerful with their own hands should consider building. It's ideal for gamers who want to optimize for specific titles, streamers needing robust multi-tasking capabilities, or enthusiasts who enjoy tweaking and upgrading their systems.

What are the biggest risks when building a gaming PC?

The primary risks include damaging components through static electricity (easily mitigated with an anti-static wrist strap), incorrect installation (e.g., forcing a CPU), or choosing incompatible parts. However, following guides carefully and double-checking compatibility significantly reduces these risks. Most components are quite robust, and modern motherboards have features to prevent common installation errors.

What are the future trends in gaming PC components?

Future trends include continued advancements in CPU core counts and clock speeds, more efficient and powerful GPUs with improved ray tracing and AI capabilities, faster DDR5 RAM, and increasing adoption of PCIe 5.0 for even quicker storage and GPU communication. We'll also see more integration of AI acceleration at the hardware level, enhancing both gaming and productivity tasks.

Ready to stop dreaming and start playing? With this comprehensive guide on how to build a gaming PC, you have all the knowledge and confidence to assemble your very own high-performance machine. Dive into the rewarding world of DIY PC building and unlock the ultimate gaming experience tailored just for you.

Topics: how to build a gaming PCDIY gaming computerPC building guidegaming PC componentscustom gaming rig
Leo List
Brampton weed
Adultwork EstrelaBet Vai de Bet R7 Bet Betão Galera Bet Rainbet Bet9ja Shop SportyBet BetKing Sisal Loto Foot Hollywoodbets YesPlay Odibets RushBet Jugabet BetWarrior BetCity MSport betPawa Fortebet