✓ Building a custom PC can save money and offer superior performance compared to pre-builts.
✓ Careful component selection is crucial for compatibility and meeting performance goals.
✓ Static electricity is a major risk; proper grounding is essential during assembly.
✓ Patience and attention to detail are key to a successful first-time build.
How It Works
1
Research & Component Selection
Determine your PC's purpose (gaming, work, etc.) and research compatible components that fit your budget and performance needs. This foundational step ensures a balanced and effective system.
2
Gather Tools & Prepare Workspace
Collect necessary tools like screwdrivers and zip ties, and prepare a clean, well-lit workspace. Ensure proper anti-static precautions are in place before handling sensitive components.
3
Assemble Core Components
Install the CPU, cooler, RAM, and M.2 SSD onto the motherboard outside the case. This makes the initial, delicate installations easier and safer, reducing potential damage.
4
Final Assembly & Cable Management
Mount the motherboard, GPU, PSU, and other storage drives inside the PC case. Focus on meticulous cable management for optimal airflow and a clean aesthetic.
Understanding Your Needs and Choosing the Right Components
Photo: Djenz Van Eysendeyk / Pexels
Embarking on the journey of how to build a custom PC step by step begins not with screwdrivers, but with introspection. Before you even think about ordering parts, you need to clearly define the primary purpose of your new machine. Is it destined to be a high-refresh-rate gaming beast, a workstation for intensive video editing or 3D rendering, a silent home theater PC, or a reliable everyday productivity hub? Each use case dictates a vastly different set of component priorities and budget allocations. For instance, a dedicated gaming PC will prioritize a powerful graphics card (GPU) and a capable processor (CPU), while a rendering workstation might lean more heavily on a high core-count CPU and abundant, fast RAM. A budget-friendly office PC, on the other hand, might focus on an integrated GPU and a solid-state drive (SSD) for snappy performance without breaking the bank.
Once your primary use case is established, the real fun begins: selecting your components. This is arguably the most critical stage, as compatibility and performance bottlenecks are born here. The core components you'll need to consider are:
1. **CPU (Central Processing Unit):** The brain of your computer. Intel and AMD are the two main players. For gaming, look for high clock speeds; for productivity and multi-tasking, consider more cores.
2. **Motherboard:** The nervous system that connects everything. Ensure it's compatible with your chosen CPU (socket type), RAM (DDR4/DDR5), and has enough PCIe slots for your GPU and M.2 slots for SSDs.
3. **RAM (Random Access Memory):** Your PC's short-term memory. 16GB is a good starting point for most users, 32GB or more for demanding tasks. Speed (MHz) and latency (CL) also matter.
4. **GPU (Graphics Processing Unit):** Essential for gaming, video editing, and other graphically intensive tasks. Nvidia GeForce and AMD Radeon are the dominant brands. This is often the most expensive component.
5. **Storage:**
* **SSD (Solid State Drive):** For your operating system and frequently used applications. NVMe M.2 SSDs are the fastest, followed by SATA SSDs.
* **HDD (Hard Disk Drive):** For mass storage of files, games, and media where speed isn't paramount.
6. **PSU (Power Supply Unit):** Provides power to all components. Calculate your estimated wattage needs (online calculators are helpful) and add a buffer. Look for a reputable brand and an 80 PLUS efficiency rating (Bronze, Gold, Platinum, Titanium).
7. **Case:** Houses all your components. Consider size (ATX, Micro-ATX, Mini-ITX), airflow, aesthetics, and features like USB ports and fan mounts.
8. **CPU Cooler:** If your CPU doesn't come with one (or if you need better performance/less noise), you'll need an aftermarket air cooler or an All-in-One (AIO) liquid cooler.
9. **Operating System:** Windows, Linux, or macOS (though macOS on custom builds is complex).
Researching compatibility is paramount. Websites like PCPartPicker.com are invaluable tools that help you select components and automatically flag potential compatibility issues. They also provide price comparisons, making it easier to stick to your budget. Don't be afraid to read reviews, watch build guides, and consult forums. The more informed you are at this stage, the smoother your build process will be. Remember, a well-planned build is a successful build. Taking your time here will save countless headaches down the line. For more detailed information on specific components, consider exploring resources on computer hardware explained.
Preparing Your Workspace and Pre-Assembly Checks
Photo: Andrey Matveev / Pexels
Before you even unbox your precious components, setting up a proper workspace is crucial for a smooth and safe build. Think of it as preparing the operating room for a delicate procedure. First, find a clean, well-lit, and spacious area. A large dining table or a dedicated workbench works perfectly. Clear away any clutter that could get in the way or cause static discharge. Dust, crumbs, or even pet hair can be detrimental to sensitive electronics.
Next, gather your tools. You don't need a professional workshop, but a few essentials will make your life much easier:
* **Phillips Head Screwdriver (Magnetic Tip Recommended):** This is your most used tool. A magnetic tip prevents tiny screws from getting lost.
* **Zip Ties or Velcro Straps:** For efficient cable management, which is vital for airflow and aesthetics.
* **Anti-Static Wrist Strap:** Absolutely essential. Static electricity is the silent killer of computer components. Attach one end to your wrist and the other to a grounded metal object, like the unpainted metal of your PC case (after plugging in the PSU, but keeping it off).
* **Flashlight or Headlamp:** For illuminating dark corners inside the case.
* **Small Bowl or Magnetic Tray:** To keep track of all those tiny screws.
* **Canned Air:** For blowing away dust or debris.
* **Isopropyl Alcohol (90%+) and Microfiber Cloth:** For cleaning CPU surfaces if you ever need to reapply thermal paste.
Once your workspace is ready and tools are at hand, it's time for some crucial pre-assembly checks. Carefully unbox each component, but avoid tearing open anti-static bags until you're ready to install them. Inspect everything for any visible damage – bent pins on a CPU or motherboard socket, cracked PCBs, or missing accessories. It's much easier to arrange for returns or replacements now than after you've spent hours assembling.
Lay out your motherboard on its anti-static bag on a non-conductive surface (like the cardboard box it came in). This is a common practice for 'bench testing' or 'out-of-case assembly' of the core components. Installing the CPU, CPU cooler, and RAM onto the motherboard *before* putting it into the case can simplify these delicate installations. It gives you more room to maneuver and better visibility, reducing the risk of accidental damage. Ensure your anti-static strap is always connected when handling components, especially the CPU and RAM. Read the manuals for each component – they contain vital information specific to your parts, such as correct RAM slot population for dual-channel memory or specific cooler mounting instructions. This preparatory phase ensures you're working in the safest and most efficient environment, setting the stage for a successful build.
Assembling the Core: CPU, Cooler, RAM, and M.2 SSD
Photo: Andrey Matveev / Pexels
With your workspace prepared and components inspected, it's time for the most delicate and crucial part of how to build a custom PC step by step: installing the core components onto the motherboard. This step is best performed with the motherboard outside the case, resting on its anti-static bag or a non-conductive surface like its cardboard box.
**1. Installing the CPU:** This is often the most nerve-wracking part for first-time builders.
* **Intel:** Lift the retention arm on the CPU socket. Carefully align the CPU's triangular arrow (or notches) with the corresponding mark on the socket. Gently place the CPU straight down into the socket; it should sit without force. Lower the retention arm until it clicks, which might require a bit of pressure – don't worry, this is normal.
* **AMD:** Lift the retention arm. Align the gold triangle on the CPU with the triangle on the socket. Gently lower the CPU into the socket; it should drop in easily. If it doesn't, do not force it. Re-check alignment. Once seated, lower the retention arm.
* *Crucial Warning:* Never force the CPU into the socket. Bent pins on either the CPU or motherboard socket will render the component useless and void warranties.
**2. Installing the CPU Cooler:**
* **Stock Coolers/Pre-applied Thermal Paste:** If your CPU comes with a stock cooler, it usually has thermal paste pre-applied. Simply align it with the mounting holes/clips and secure it according to the instructions.
* **Aftermarket Air Coolers:** Apply a pea-sized dot or a thin line of thermal paste to the center of the CPU's integrated heat spreader (IHS), or follow the cooler manufacturer's instructions. Mount the cooler's backplate (if required) and then the heatsink, ensuring even pressure. Connect the cooler's fan cable to the CPU_FAN header on the motherboard.
* **AIO Liquid Coolers:** Mount the backplate and standoffs. Apply thermal paste if not pre-applied. Mount the CPU block, ensuring even pressure. Install the radiator and fans into your case (this can be done later, but plan its placement now). Connect the pump header to the AIO_PUMP or CPU_OPT header and the fan headers to CPU_FAN or CHA_FAN headers.
**3. Installing RAM (Random Access Memory):** Locate the DIMM slots on your motherboard.
* Check your motherboard manual for the correct slots to populate for dual-channel memory (usually slots 2 and 4, or 1 and 3, counting from the CPU).
* Open the clips on both ends of the chosen DIMM slots.
* Align the notch on the RAM stick with the notch in the DIMM slot.
* Apply firm, even pressure to both ends of the RAM stick until the clips snap into place and the stick is fully seated. You should hear audible clicks.
**4. Installing M.2 NVMe SSD:** If your motherboard supports M.2 NVMe drives, this is a straightforward installation.
* Locate the M.2 slot(s) on your motherboard (often under a heatsink).
* Remove the small screw and standoff from the M.2 slot.
* Angle the M.2 SSD into the slot, ensuring the contacts are fully inserted.
* Gently push the SSD down until it's horizontal and secure it with the screw onto the standoff. If your motherboard has an M.2 heatsink, remove its protective film and install it over the SSD.
With these critical components installed, you have the heart of your PC ready. This pre-assembly on the workbench simplifies the process significantly before you introduce the confines of the PC case. Remember to double-check all connections and seating before proceeding. For further guidance on optimizing your system's performance, consider learning about optimizing PC performance.
Final Assembly, Cable Management, and First Boot
Photo: Andrey Matveev / Pexels
Now that your motherboard is populated with the CPU, cooler, RAM, and M.2 SSD, it's time to bring everything together inside the PC case. This stage involves mounting the motherboard, installing the graphics card, power supply, and any additional storage, followed by the often-dreaded but crucial task of cable management.
**1. Install Motherboard Standoffs and I/O Shield:**
* Before placing the motherboard, ensure the correct standoffs are installed in your case. Most cases come with them pre-installed for standard ATX, but double-check your motherboard's form factor.
* If your case didn't come with an integrated I/O shield, snap the metal I/O shield into the back of your case from the inside. Make sure it's oriented correctly.
**2. Mount the Motherboard:**
* Carefully lower your motherboard into the case, aligning the screw holes with the standoffs.
* Gently push the I/O ports through the I/O shield opening.
* Secure the motherboard with the appropriate screws. Don't overtighten, but ensure it's snug.
**3. Install the Graphics Card (GPU):**
* Locate the primary PCIe x16 slot (usually the top-most, reinforced slot).
* Remove the necessary PCIe slot covers from the back of your case.
* Open the retention clip at the end of the PCIe slot.
* Align the GPU with the slot and press down firmly and evenly until it clicks into place. The retention clip should snap shut.
* Secure the GPU to the case with screws.
**4. Install the Power Supply Unit (PSU):**
* Most modern cases mount the PSU at the bottom. Slide the PSU into its designated bay, ensuring the fan is oriented correctly (usually facing downwards if there's a filtered vent, or upwards if not).
* Secure the PSU to the case with screws from the back.
**5. Install Additional Storage (HDDs/SATA SSDs):**
* Mount your 2.5-inch SATA SSDs and 3.5-inch HDDs into the designated drive bays/caddies in your case. Many cases have tool-less designs; otherwise, use screws.
**6. Connect All Cables (The Cable Management Challenge):** This is where patience pays off. Connect the following:
* **Motherboard Power:** The large 24-pin ATX power connector and the 4/8-pin CPU power connector (usually top-left of the motherboard).
* **GPU Power:** Connect PCIe power cables from the PSU to your graphics card (if required).
* **SATA Power & Data:** Connect SATA power cables from the PSU to your SATA SSDs/HDDs, and SATA data cables from your drives to the SATA ports on your motherboard.
* **Case Front Panel Connectors:** This is often the trickiest. Consult your motherboard manual carefully for the correct pins for Power SW, Reset SW, HDD LED, Power LED, and USB/Audio headers. These are usually tiny and require precision.
* **Case Fans:** Connect case fans to appropriate fan headers on your motherboard.
Route cables behind the motherboard tray and use zip ties or Velcro straps to bundle them neatly. Good cable management improves airflow, looks cleaner, and makes future upgrades easier.
**7. First Boot and BIOS Configuration:**
* Once all components are connected, do a final check. Ensure no loose screws are rattling around.
* Connect your monitor, keyboard, and mouse. Plug in the power cable to the PSU and flip the PSU switch to 'on'.
* Press the power button on your case. If all goes well, your PC should power on, fans will spin, and you should see a signal on your monitor, typically leading to the BIOS/UEFI screen.
* Enter the BIOS (usually by pressing DEL or F2 during boot) to:
* Verify all components are recognized (CPU, RAM, Storage).
* Set the correct RAM speed (enable XMP/DOCP).
* Set the boot order to your USB drive containing the operating system installer.
**8. Install Operating System:**
* Follow the on-screen prompts to install Windows, Linux, or your chosen OS onto your primary SSD.
**9. Install Drivers and Updates:**
* After OS installation, install chipset drivers from your motherboard manufacturer's website, then graphics drivers from Nvidia/AMD, and any other peripheral drivers. Run Windows Update or your OS's equivalent.
Congratulations! You've successfully completed how to build a custom PC step by step. Enjoy your new, powerful, custom-built machine!
Common Mistakes to Avoid and Essential Troubleshooting Tips
Building a PC for the first time, even with a detailed guide on how to build a custom PC step by step, can present challenges. Knowing common pitfalls and basic troubleshooting can save you hours of frustration.
**Common Mistakes to Avoid:**
1. **Forcing Components:** This is the golden rule. If a component doesn't fit easily, stop. Re-read the manual, check alignment, and ensure compatibility. Forcing parts, especially the CPU or RAM, can cause irreversible damage.
2. **Neglecting Anti-Static Precautions:** Static electricity is invisible and can fry components. Always use an anti-static wrist strap, work on a non-carpeted surface, and touch a grounded metal object regularly.
3. **Forgetting the I/O Shield:** This small piece of metal is often overlooked until the motherboard is fully installed. It's much harder to put in afterward.
4. **Incorrect RAM Installation:** Not seating RAM sticks fully or placing them in the wrong slots (not following dual-channel configuration) can lead to a PC that won't boot or runs slowly. Consult your motherboard manual for the correct slots.
5. **Improper Thermal Paste Application/CPU Cooler Mounting:** Too much, too little, or uneven thermal paste application, or a poorly mounted cooler, can lead to overheating and throttling.
6. **Loose or Incorrectly Connected Cables:** Double-check all power cables (24-pin ATX, 8-pin CPU, PCIe for GPU) and front panel connectors. The tiny front panel headers (power switch, reset, LEDs) are notorious for causing no-boot scenarios.
7. **Forgetting to Flip the PSU Switch:** A surprisingly common mistake. The large switch on the back of your power supply needs to be in the 'on' (I) position.
8. **Not Updating BIOS/Drivers:** An outdated BIOS can cause compatibility issues with newer CPUs or RAM. Outdated drivers can lead to performance issues or instability.
**Essential Troubleshooting Tips (If Your PC Doesn't Boot):**
1. **The "No Post" Checklist:** If your PC powers on (fans spin, lights come on) but nothing appears on screen (No Post - Power On Self Test):
* **Check Monitor Connection:** Ensure the display cable is plugged into the *graphics card*, not the motherboard's integrated graphics port (unless you know your CPU has integrated graphics and you're not using a GPU).
* **Reseat RAM:** Remove and reinsert each RAM stick firmly. Try booting with just one stick.
* **Reseat GPU:** Remove and reinsert the graphics card. Ensure its power cables are securely connected.
* **Check CPU Power:** Ensure the 4/8-pin CPU power connector is fully seated.
* **Clear CMOS:** This resets your motherboard's BIOS settings to default. There's usually a jumper or a button on the motherboard or back I/O.
2. **Listen for Beep Codes:** Many motherboards emit a series of beeps if there's a critical error (e.g., no RAM, GPU error). Consult your motherboard manual to decipher these codes.
3. **Minimal Boot:** Disconnect everything non-essential: all storage drives, extra fans, USB devices, etc. Try to boot with just the CPU, cooler, one stick of RAM, and the GPU. If it boots, add components back one by one to isolate the issue.
4. **Check All Power Connections:** Re-verify that the 24-pin ATX, CPU, and GPU power cables are firmly plugged into both the component and the PSU (especially if it's a modular PSU).
5. **Verify Front Panel Connections:** Double-check the tiny power switch and reset switch headers on the motherboard. If unsure, you can momentarily short the power switch pins with a screwdriver to test if the PC powers on.
Patience is your best tool when troubleshooting. Take breaks if you get frustrated, and tackle issues methodically. The PC building community online is also a vast resource – don't hesitate to post your problem on forums with detailed descriptions and photos. Most issues are minor connection errors that can be resolved with careful inspection.
Comparison
Feature
Custom PC
Pre-Built PC
Gaming Laptop
Performance/Price
Excellent (Optimized)
Good (Value/Convenience)
Moderate (Portability Premium)
Upgradeability
High (Modular Components)
Limited (Proprietary Parts)
Very Limited (RAM/Storage Only)
Component Choice
Full Control (Tailored)
Fixed Configurations
Fixed Configurations
Assembly Difficulty
Moderate to High
None (Ready-to-Use)
None (Ready-to-Use)
Troubleshooting
Requires DIY Skills
Manufacturer Support
Manufacturer Support
Warranty
Individual Component
System-wide
System-wide
Thermal Management
Excellent (Custom Cooling)
Good (Standard Cooling)
Challenging (Compact Design)
Resale Value
Good (Part Out Potential)
Moderate (Entire System)
Lower (Rapid Depreciation)
What Readers Say
★★★★★
"Following this guide on how to build a custom PC step by step made my first build incredibly smooth. The detailed component selection advice was a game-changer, helping me pick parts I never would have considered otherwise. My new gaming rig runs flawlessly!"
Alex P. · Austin, TX
★★★★★
"I was intimidated by PC building, but this article broke down how to build a custom PC step by step into manageable chunks. The anti-static tips saved me from potential component damage. Highly recommend for any first-timer!"
Maria K. · Seattle, WA
★★★★★
"After reading this, I successfully built a PC for my video editing business. The performance is exactly what I needed, and I saved hundreds compared to buying a pre-built workstation. The cable management section was surprisingly helpful for a clean aesthetic."
Ben L. · Orlando, FL
★★★★★
"The guide on how to build a custom PC step by step was incredibly thorough, though I did run into a minor BIOS issue that required a quick Google search. Still, the core assembly instructions were clear and the troubleshooting section pointed me in the right direction."
Chloe S. · Denver, CO
★★★★★
"As a student on a budget, building my own PC seemed like the only way to get the performance I needed. This guide walked me through how to build a custom PC step by step, allowing me to customize my system for engineering simulations and light gaming without overspending."
David R. · Boston, MA
Frequently Asked Questions
Is building a custom PC really cheaper than buying a pre-built one?
Often, yes, building a custom PC can be more cost-effective, especially for mid-range to high-end systems. You pay for exactly what you need, avoid 'builder's fees,' and can often snag components on sale. However, very low-end pre-builts can sometimes be cheaper due to bulk purchasing discounts on components.
How long does it take to build a custom PC for a first-timer?
For a first-time builder following a guide like how to build a custom PC step by step, expect to spend anywhere from 4 to 8 hours for the physical assembly. This includes unboxing, reading manuals, and meticulous cable management. Software installation and driver updates will add a few more hours.
What tools do I absolutely need to build a PC?
The most essential tools are a Phillips head screwdriver (magnetic tip is highly recommended), an anti-static wrist strap, and zip ties or Velcro straps for cable management. A small bowl for screws and a flashlight can also be very helpful. You generally don't need specialized tools.
What is the biggest risk when building a custom PC?
The biggest risk is damaging components through static electricity or by forcing them into place incorrectly. Static discharge can permanently damage sensitive electronics, while forcing parts can bend pins on CPUs or motherboard sockets, rendering them unusable. Always prioritize anti-static measures and gentleness.
Can I use old components from my existing PC in a new custom build?
It depends on the component and its age/compatibility. Storage drives (HDDs/SATA SSDs) are often reusable. RAM, CPUs, and motherboards are typically tied to specific generations and sockets, making them less likely to be compatible with newer parts. GPUs can sometimes be reused if they still meet your performance needs.
Who should consider building their own custom PC?
Anyone looking for maximum performance for their budget, specific aesthetic control, a deeper understanding of their machine, or the ability to easily upgrade individual components down the line should consider building their own PC. It's particularly rewarding for gamers, content creators, and tech enthusiasts.
Is overheating a common problem in custom builds?
Overheating can be a problem if proper cooling is neglected. This includes choosing an inadequate CPU cooler, poor case airflow (insufficient or improperly oriented fans), or bad cable management obstructing air paths. Proper planning and installation, as covered in how to build a custom PC step by step, will mitigate this.
What are the future trends in PC building?
Future trends include increased integration of AI accelerators, more efficient power delivery systems, widespread adoption of PCIe 5.0 and DDR5 memory, further advancements in liquid cooling technologies, and potentially modular or tool-less designs becoming more prevalent across all components for easier assembly and maintenance.
Armed with this comprehensive guide on how to build a custom PC step by step, you're ready to embark on an incredibly rewarding journey. Take your time, follow each instruction carefully, and enjoy the unparalleled satisfaction of powering on a machine you built with your own hands. Your dream PC awaits!

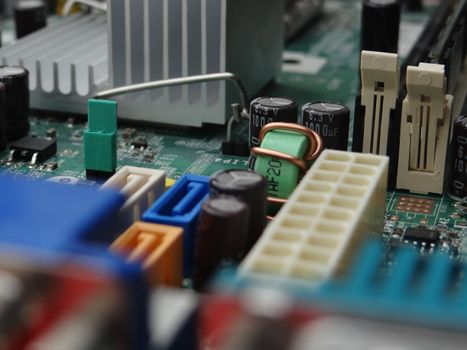 Photo: Djenz Van Eysendeyk / Pexels
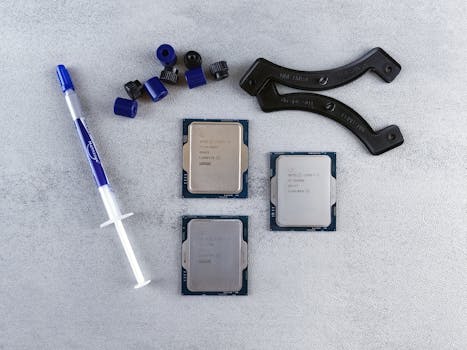 Photo: Andrey Matveev / Pexels
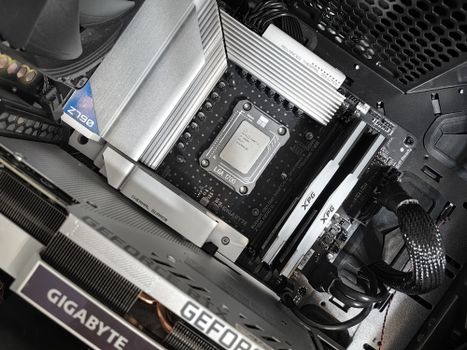 Photo: Andrey Matveev / Pexels
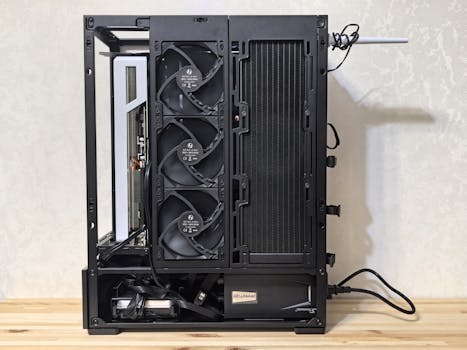 Photo: Andrey Matveev / Pexels